https://github.com/fullcalendar/fullcalendar-examples/tree/main/react-typescript
GitHub - fullcalendar/fullcalendar-examples: Simple example projects for FullCalendar
Simple example projects for FullCalendar. Contribute to fullcalendar/fullcalendar-examples development by creating an account on GitHub.
github.com
풀캘린더의 DOCS 를 들어가, React-Typescript 의 example 코드를 확인한다.
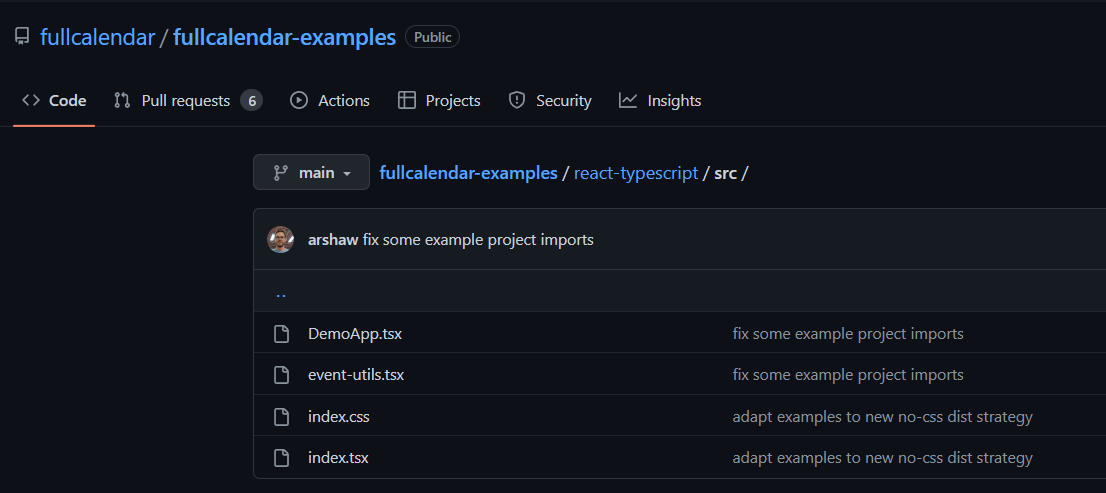
DemoApp (풀캘린더 모든 무료기능 기본)
event-util (초기 데이터, 및 데이터 확인)
index.css (기본 스타일링 )
이렇게 긁어온다.
필요한 install 은
npm i fullcalendar
npm i @fullcalendar/react
이렇게 두가지 이다. 현재는
DemoApp 부터 확인해보자.
import React from 'react'
import {
  EventApi,
  DateSelectArg,
  EventClickArg,
  EventContentArg,
  formatDate,
} from '@fullcalendar/core'
import FullCalendar from '@fullcalendar/react'
import dayGridPlugin from '@fullcalendar/daygrid'			// 원별 데이터
import timeGridPlugin from '@fullcalendar/timegrid'			// 주별 데이터
import interactionPlugin from '@fullcalendar/interaction'
import { INITIAL_EVENTS, createEventId } from './event-utils'	// 초기값데이터와, 이벤트아이디 생성 로직

interface DemoAppState {
  weekendsVisible: boolean
  currentEvents: EventApi[]
}

export default class DemoApp extends React.Component<{}, DemoAppState> {

  state: DemoAppState = {
    weekendsVisible: true,
    currentEvents: []
  }

  render() {
    return (
      <div className='demo-app'>
        {this.renderSidebar()}
        <div className='demo-app-main'>
          <FullCalendar
            plugins={[dayGridPlugin, timeGridPlugin, interactionPlugin]}	// 월별, 주별 플러그인들
            headerToolbar={{
              left: 'prev,next today',
              center: 'title',
              right: 'dayGridMonth,timeGridWeek,timeGridDay'	// 우측상단, 월,주,년 선택 버튼들
            }}
            initialView='dayGridMonth'
            editable={true}				// 각종 옵션들
            selectable={true}
            selectMirror={true}
            dayMaxEvents={true}
            weekends={this.state.weekendsVisible}
            initialEvents={INITIAL_EVENTS} 		// 초기값에 들어갈 데이터
            events = {}					// 실제로 들어가는 데이터
            select={this.handleDateSelect}		// 선택되면 실행될 함수
            eventContent={renderEventContent} 		// custom render function
            eventClick={this.handleEventClick}		// 세부이벤트 클릭하면 실행되는 함수
            eventsSet={this.handleEvents} 		// called after events are initialized/added/changed/removed
            /* you can update a remote database when these fire:
                eventAdd={function(){}}			// 추가가능한 함수들
                eventChange={function(){}}		// 추가가능한 함수들
                eventRemove={function(){}}		// 추가가능한 함수들
            */
          />
        </div>
      </div>
    )
  }

  renderSidebar() {		// 사이드바
    return (
      <div className='demo-app-sidebar'>
        <div className='demo-app-sidebar-section'>
          <h2>Instructions</h2>
          <ul>
            <li>Select dates and you will be prompted to create a new event</li>
            <li>Drag, drop, and resize events</li>
            <li>Click an event to delete it</li>
          </ul>
        </div>
        <div className='demo-app-sidebar-section'>
          <label>
            <input
              type='checkbox'
              checked={this.state.weekendsVisible}
              onChange={this.handleWeekendsToggle}
            ></input>
            toggle weekends
          </label>
        </div>
        <div className='demo-app-sidebar-section'>
          <h2>All Events ({this.state.currentEvents.length})</h2>
          <ul>
            {this.state.currentEvents.map(renderSidebarEvent)}
          </ul>
        </div>
      </div>
    )
  }

  handleWeekendsToggle = () => {	// 주별 버튼 누르면 나오는 로직
    this.setState({
      weekendsVisible: !this.state.weekendsVisible
    })
  }

  handleDateSelect = (selectInfo: DateSelectArg) => {	// 캘린더 클릭하면 나올 로직
    let title = prompt('Please enter a new title for your event')
    let calendarApi = selectInfo.view.calendar

    calendarApi.unselect() // clear date selection

    if (title) {
      calendarApi.addEvent({
        id: createEventId(),
        title,
        start: selectInfo.startStr,
        end: selectInfo.endStr,
        allDay: selectInfo.allDay
      })
    }
  }

  handleEventClick = (clickInfo: EventClickArg) => {	// 세부 이벤트 클릭하면 나올 로직
    if (confirm(`Are you sure you want to delete the event '${clickInfo.event.title}'`)) {
      clickInfo.event.remove()
    }
  }

  handleEvents = (events: EventApi[]) => {
    this.setState({
      currentEvents: events
    })
  }

}

function renderEventContent(eventContent: EventContentArg) {	// 얘는 뭐지
  return (
    <>
      <b>{eventContent.timeText}</b>
      <i>{eventContent.event.title}</i>
    </>
  )
}

function renderSidebarEvent(event: EventApi) {		// 사이드바 이벤트 로직
  return (
    <li key={event.id}>
      <b>{formatDate(event.start!, {year: 'numeric', month: 'short', day: 'numeric'})}</b>
      <i>{event.title}</i>
    </li>
  )
}
아이 길다.
내게 현재 필요한 것은
1. 월별만 있는 캘린더
2. 날짜를 클릭하면, 해당 되는 다이어리를 표시할 로직

** 사이드 바 삭제
** 기타 연별, 주별 버튼 및 기능 삭제
** 캘린더 클릭시, 추가, 삭제, 수정 로직 삭제
내게 필요한 것들만 따로 정리하면
import React from "react";
import { EventApi, DateSelectArg, EventContentArg, EventClickArg } from "@fullcalendar/core";
import FullCalendar from "@fullcalendar/react";
import dayGridPlugin from "@fullcalendar/daygrid";
import { INITIAL_EVENTS } from "./event-utils";
import styles from "./calendar.module.scss";

interface DemoAppState {
  weekendsVisible: boolean;
  currentEvents: EventApi[];
}

export default class DiaryCalendar extends React.Component<{}, DemoAppState> {
  state: DemoAppState = {
    weekendsVisible: true,
    currentEvents: [],
  };

  render() {
    return (
      <div className={styles.calendar}>
        <div className={styles.calendar__main}>
          <h1 className={styles.calendar__title}>나의 다이어리</h1>
          <FullCalendar
            plugins={[dayGridPlugin]}		// 월별 캘린더 플러그인만 남기고 삭제
            headerToolbar={{
              left: "prev,next today",
              center: "title",
              right: "dayGridMonth",		// 버튼 역시 월별 캘린더만 남도록 나머지 삭제
            }}
            initialView="dayGridMonth"
            weekends={this.state.weekendsVisible}
            initialEvents={INITIAL_EVENTS} 	// 초기 데이터 넣는 공간
            events={}                  		// 실제 적용될 데이터 넣는 공간
            select={this.handleDateSelect}
            eventClick={this.handleEventClick}   // 세부 이벤트 클릭시 나오는 로직
            /* you can update a remote database when these fire:
            eventAdd={function(){}}
            eventChange={function(){}}
            eventRemove={function(){}}
            */
          />
        </div>
      </div>
    );
  }


  handleDateSelect = (selectInfo: DateSelectArg) => {
	// 날짜 클릭했을때 실행될 로직
  };

  handleEventClick = (clickInfo: EventClickArg) => {
  	// 세부 이벤트 클릭했을때 실행될 함수
  };

}
EVENT-UTIL 을 확인해보자
import { EventInput } from '@fullcalendar/core'

let eventGuid = 0
let todayStr = new Date().toISOString().replace(/T.*$/, '') 	// 날짜의 표시형식

export const INITIAL_EVENTS: EventInput[] = [	// 초기이벤트값
  {
    id: createEventId(),		// 단순히 id를 +1씩 증가며 부여하는 로직
    title: 'All-day event',		// 타이틀
    start: todayStr			// 시작점
  },
  {
    id: createEventId(),
    title: 'Timed event',
    start: todayStr + 'T12:00:00'
  }
]

export function createEventId() {	// 단순히 id를 +1씩 증가며 부여하는 로직
  return String(eventGuid++)
}
이후 Store 에서 값을 받아와 사용한다면 이런 느낌일것이다.
import { EventInput } from "@fullcalendar/core";
import { store } from "../store";

let eventGuid = 0;

const allCalendarData = store.getState().calendar.calendarData;	// 스토어 값을 가져온다.
const user = store.getState().user.user;		// 스토어 값을 가져온다.

const filteredCalendar = allCalendarData.filter(	// 필요한 데이터만 필터해서
  (item) => item.email === user.userEmail
);

export const INITIAL_EVENTS: EventInput[] = filteredCalendar;	// export 한다.

export function createEventId() {	// 혹시모르니 id 값을 생성하는 로직은 그냥 둔다.
  return String(eventGuid++);
}
store 의 값을 변형시키는 것이 아니고 읽기만 할 것이므로, 직접 들어가서 값을 확인한다.
당연하게도 .ts 파일이고(.tsx 가 아니고) 컴포넌트 함수 안이 아니기 때문에,
useSelector 같은 Hook 으로 접근이 되지 않는다.
따라서 직접 참조하여 확인하는 수 밖에 없다.
store 에서 오는 값은
export interface PostCalendarType {
  // _id : string;		MongoDB 를 사용한다면
  id:string;
  title: string;
  start: string;
  // email: string;		추가적으로 필요한 것들을 더 넣어서 사용
}
이런식이 될것이다.
CSS 를 확인해보자.
.demo-app {		// 메인 앱
  display: flex;
  min-height: 100%;
  font-family: Arial, Helvetica Neue, Helvetica, sans-serif;
  font-size: 14px;
}

.demo-app-sidebar {		// 사이드바
  width: 300px;
  line-height: 1.5;
  background: #eaf9ff;
  border-right: 1px solid #d3e2e8;
}

.demo-app-sidebar-section {
  padding: 2em;
}

.demo-app-main {	// 메인 앱 바로안쪽
  flex-grow: 1;
  padding: 3em;
}

.fc { /* the calendar root */
  max-width: 1100px;
  margin: 0 auto;
}
주의사항
스타일링의 경우 기본적으로 스타일이 지정가능한(컴포넌트에 className 으로 클래스가 지정되는) 것들은
css 를 통해 가능하지만,
내부에 있는 .fc 등의 세세한 버튼들은 모듈 css 를 통해 지정이 불가능하다.
오로지 메인에 참조되는 글로벌 css 로만 지정가능하다.
따라서, 기본적인 css 는 지정하지만, 나중에 세세한 부분을 지정할 때에는
반드시 개발자 도구를 들어가서 클래스네임을 확인하고, 글로벌 css 에 그 클래스를 등록해 변경하도록 한다.
직접 사용하면 이런 느낌이 될것이다.
< 컴포넌트 >

    export default class DiaryCalendar extends React.Component<{}, DemoAppState> {
      state: DemoAppState = {
        weekendsVisible: true,
        currentEvents: [],
      };

      render() {
        return (
          <div className={styles.calendar}>
            <div className={styles.calendar__main}>
              <h1 className={styles.calendar__title}>나의 다이어리</h1>
                ...
       }

< 모듈.scss >

    .calendar {
      display: flex;
      width: 80%;
 		...
      background-color: white;

      &__main {
        flex-grow: 1;
        padding: 1rem;
      }
      &__title {
        text-align: center;
        font-size: 2.2rem;
		...
        border-radius: 10px;
        box-shadow: 1px 1px 3px gray;
      }
    }
또한 완벽히 파고들어 사용한다면 글로벌 CSS 에서 이런것들을 설정할 수 있다.
< index.scss > - 글로벌css

 .fc-button {		// 버튼 지정
   border: none !important;
 }
  .fc .fc-toolbar {		// 상단 툴바 지정
    flex-direction: column;
  }

  .fc .fc-toolbar div {		// 상단 툴바 안의 div 지정
    margin: 0.3rem;
  }

  .fc-scroller-harness-liquid {		// month 의 내부 그리드 지정
    height: 100% !important;
    min-height: 30rem !important;
  }
}
더 많은 것들을 지정할 수 있지만 이것들이 특히 유용했다.
'메인-프로젝트 > MERN - 다이어리 프로젝트' 카테고리의 다른 글
| 6. [서버] 서버설정 (1) - 기본부터 라우터와 컨트롤러, 오류처리까지 (0) | 2023.02.21 |
|---|---|
| 5.[클라이언트] - WEB SPEECH API 기반, 음성 인식 라이브러리 사용하기 (0) | 2023.02.21 |
| 3.[클라이언트] 레이아웃 애니메이션 만들기 [ React-Transition-Group + 오류 ] (0) | 2023.02.14 |
| 2.[클라이언트] 마우스를 올릴 때 마다, 움직이는 버튼 [ animated.css ] (0) | 2023.02.14 |
| 1. 초기 설계 (0) | 2023.02.13 |

댓글